Workloads
One of the core Juno products is our Kuiper workloads. This is where users can launch workloads and connect, manage, and share them.
Workload Management
Request
Users can quickly request a workload by clicking the "Request" button in the top-left corner or by opening the Catalog tab. The catalog lets you filter available templates and request a workload. You can also add new workload templates from within Genesis. Read more about workload template creation here
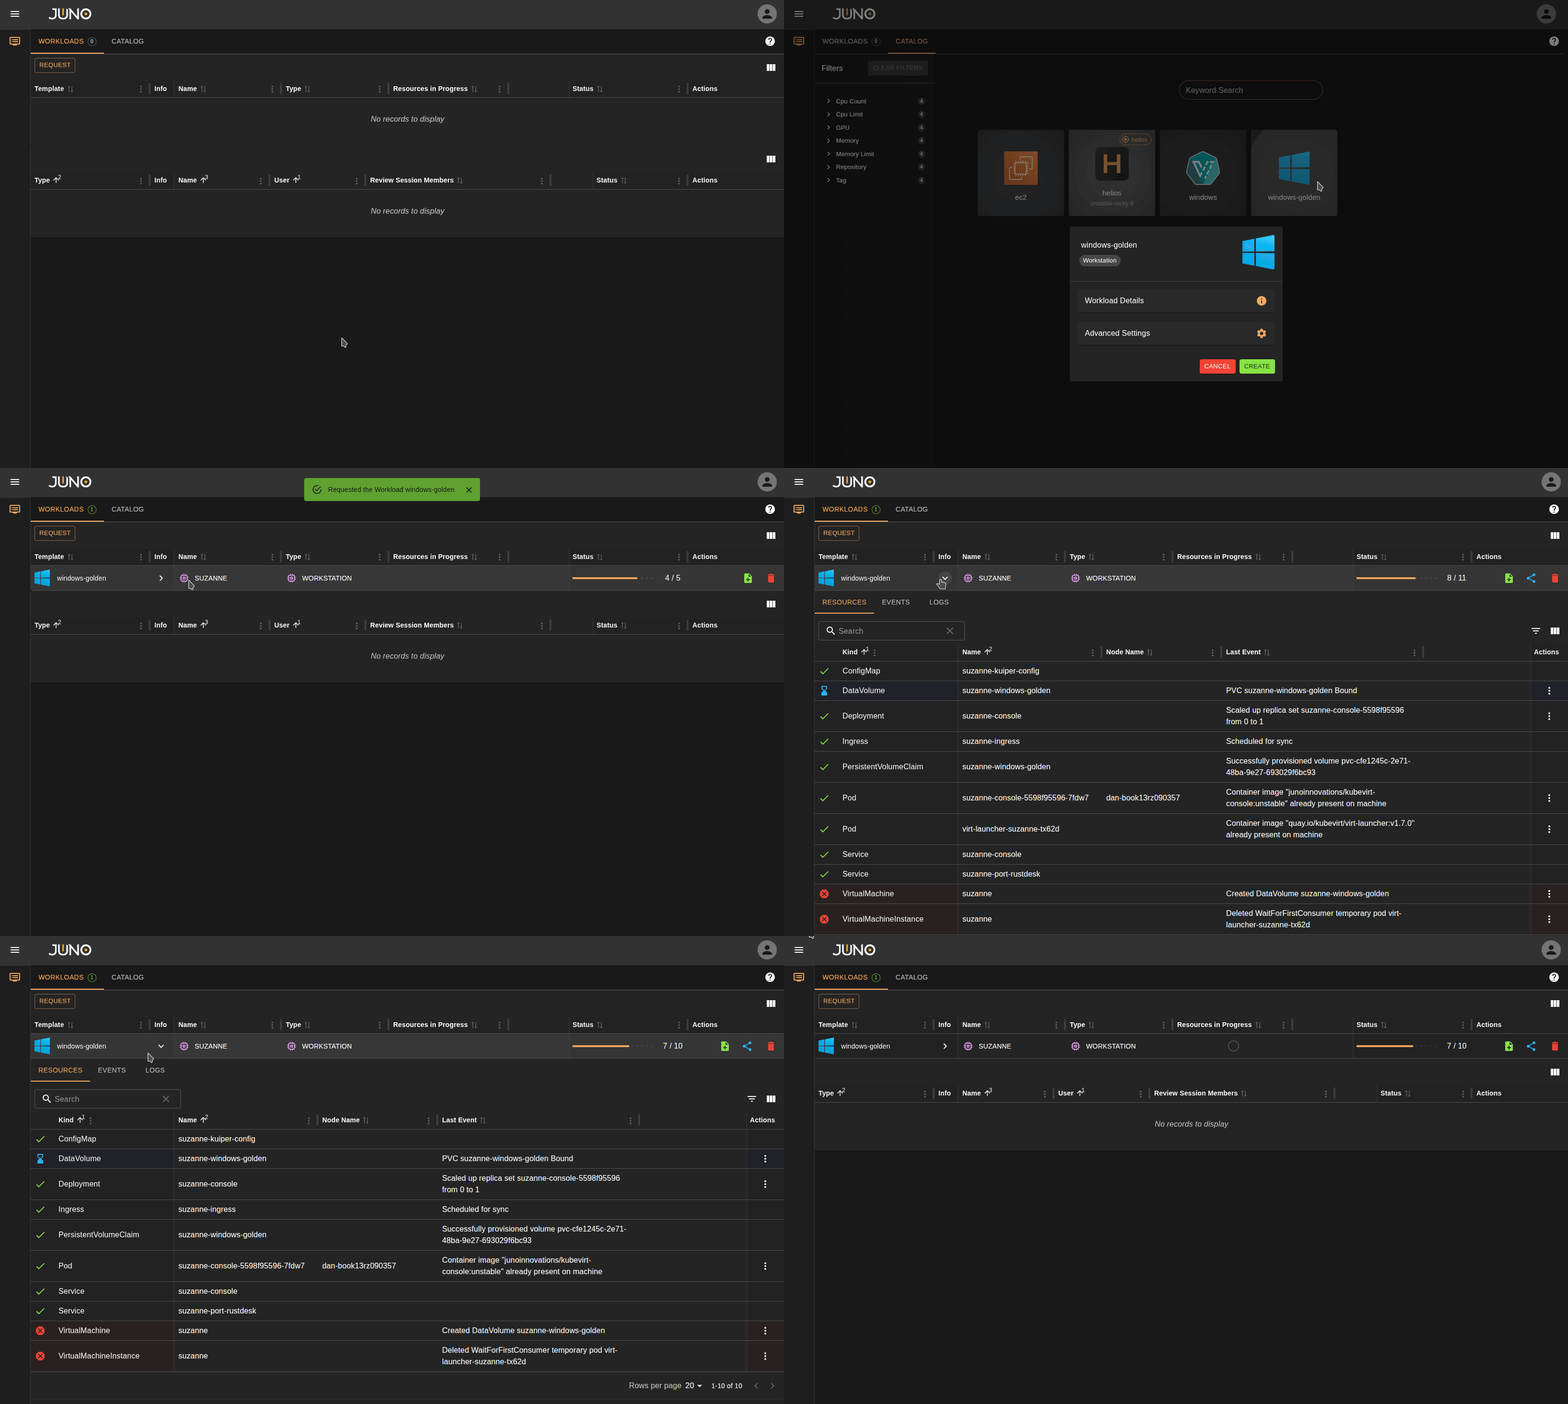
Workload Status:
Once requested you will see a status bar showing the number of resources that are ready, out of how many are left. You can also expand the workloads details panel, to see the resources table. Here you will be able to see each resource and their current state. Once all resources are ready, a connect button will appear. Some resource actions will also provide a progress wheel showing the progress percentage for that resources current action. If you hover over this progress wheel you will see the current percentage and the resource name.
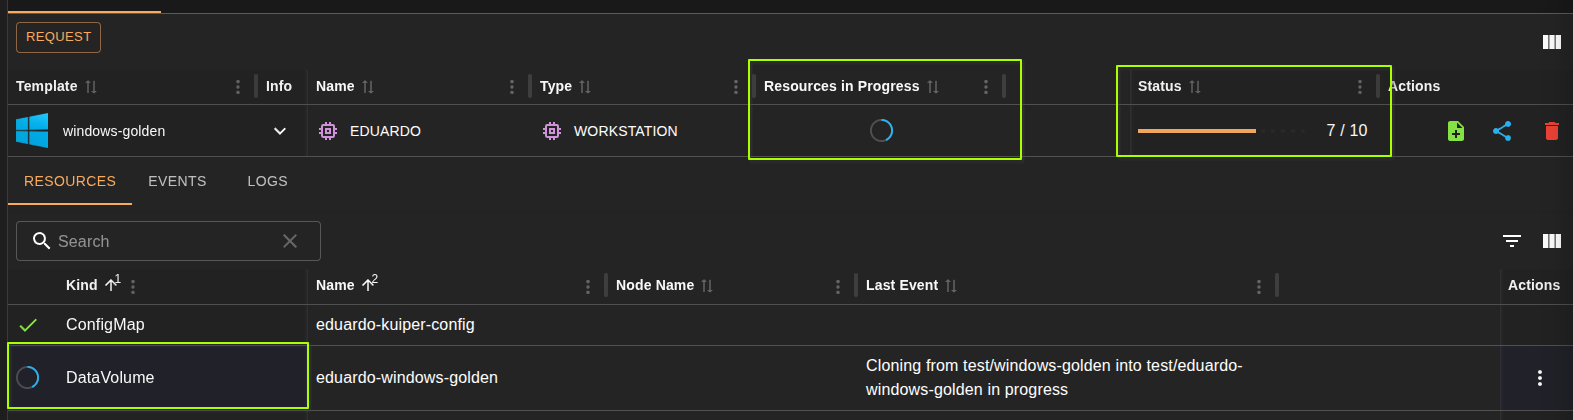
Advanced Settings
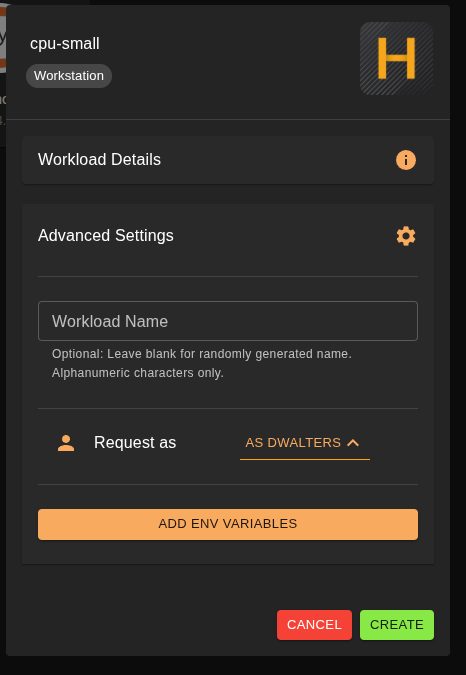
When requesting a workload, users can configure advanced settings such as a custom workload name, requesting the workload on behalf of another user, and custom environment variables.
Note
Requesting a workload on behalf of another user is restricted to admins. Adding custom environment variables prior to launch is restricted to members of the 'admin' and 'kuiper' user groups. Read more about user management here
Environment Variable Hints (env_hints)
If the workload's Terra plugin defines an env_hints entry in its metadata.yaml, the advanced settings panel will display a list of that plugin's commonly used environment variables. Click a variable from the list to add it before launching the workload, rather than typing it in manually.
Resources, Events, and Logs
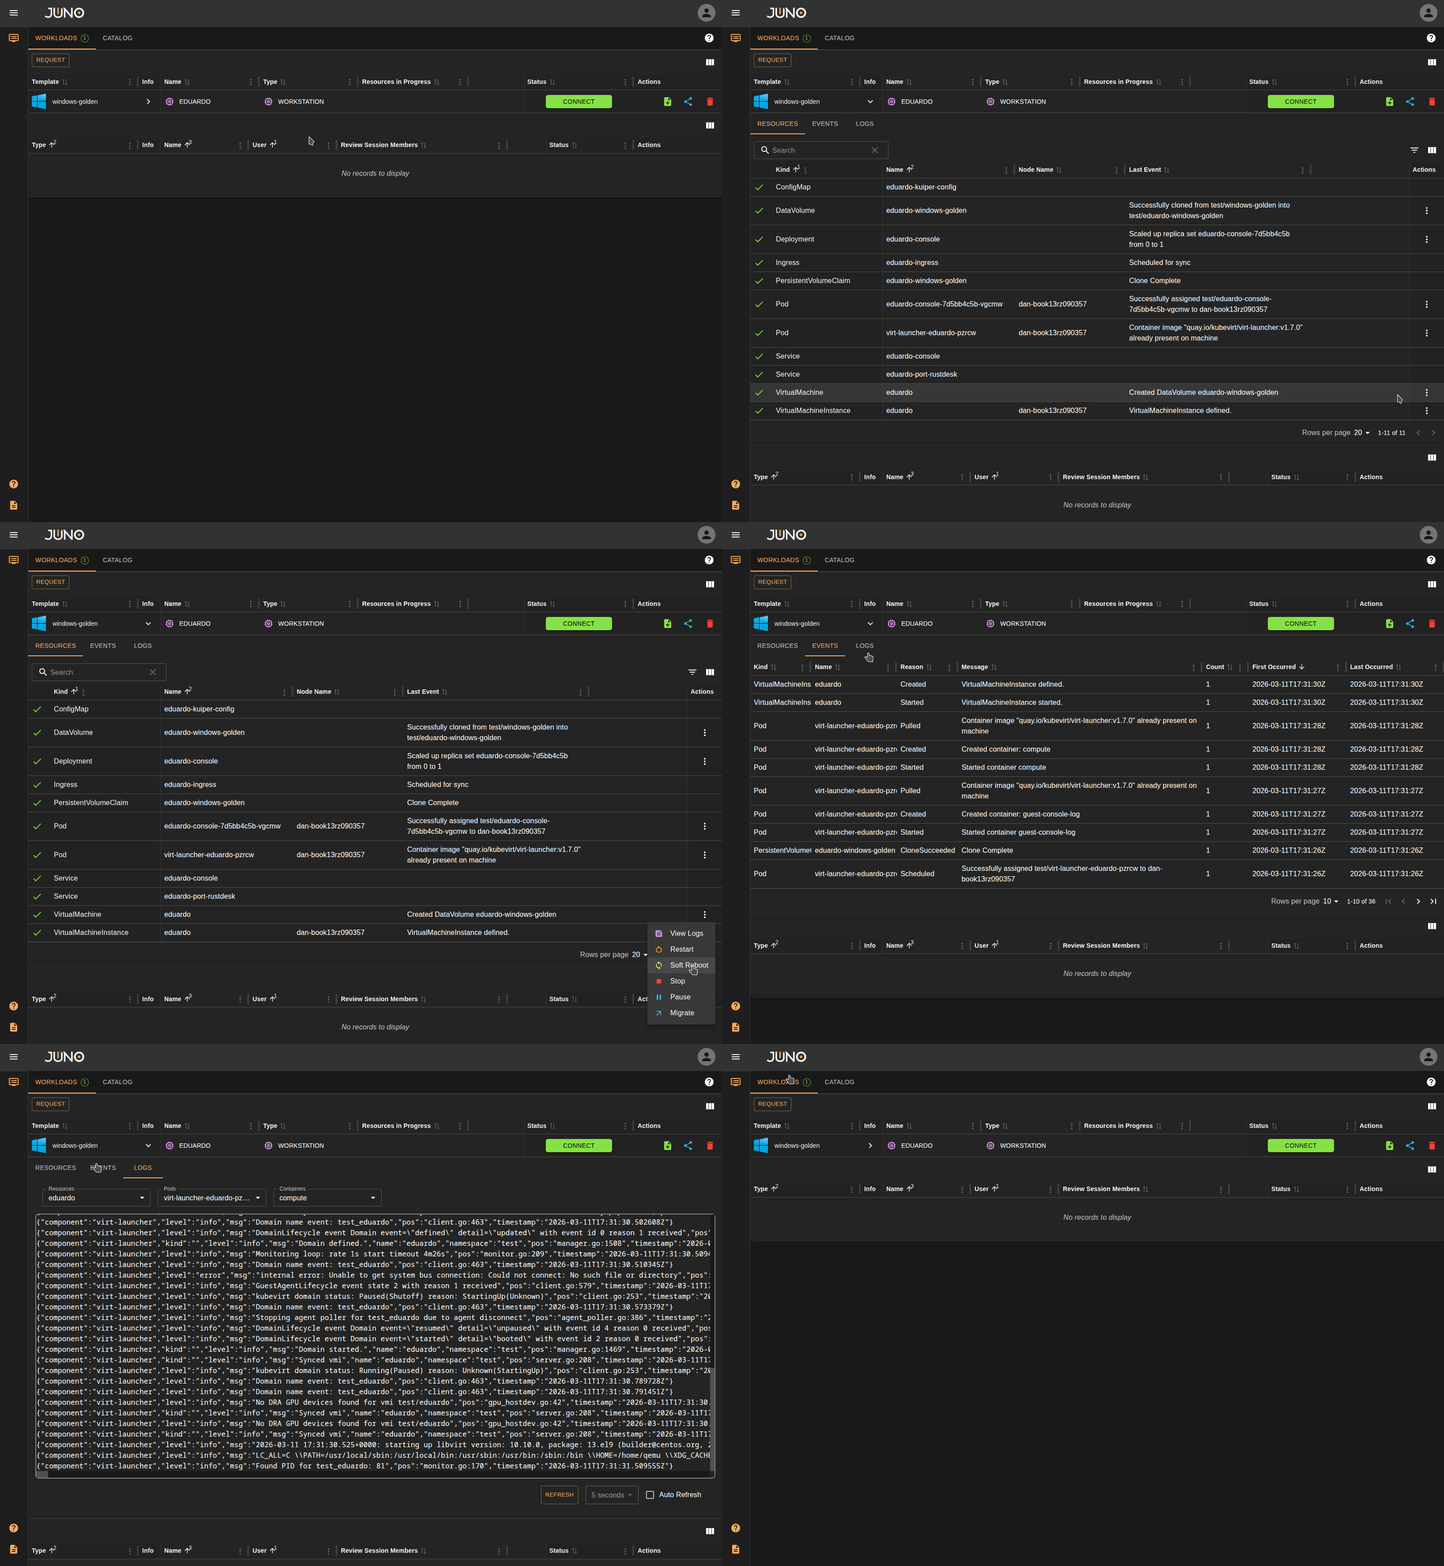
You can expand the workload row details panel to view the resources, events and logs of the running workload. Any resource that has available actions, will have these listed on the right in the "Actions" column. Simply click the 3 dots to show the resources available actions. To learn more about some of the available resource actions. See our resource actions documentation
Connect
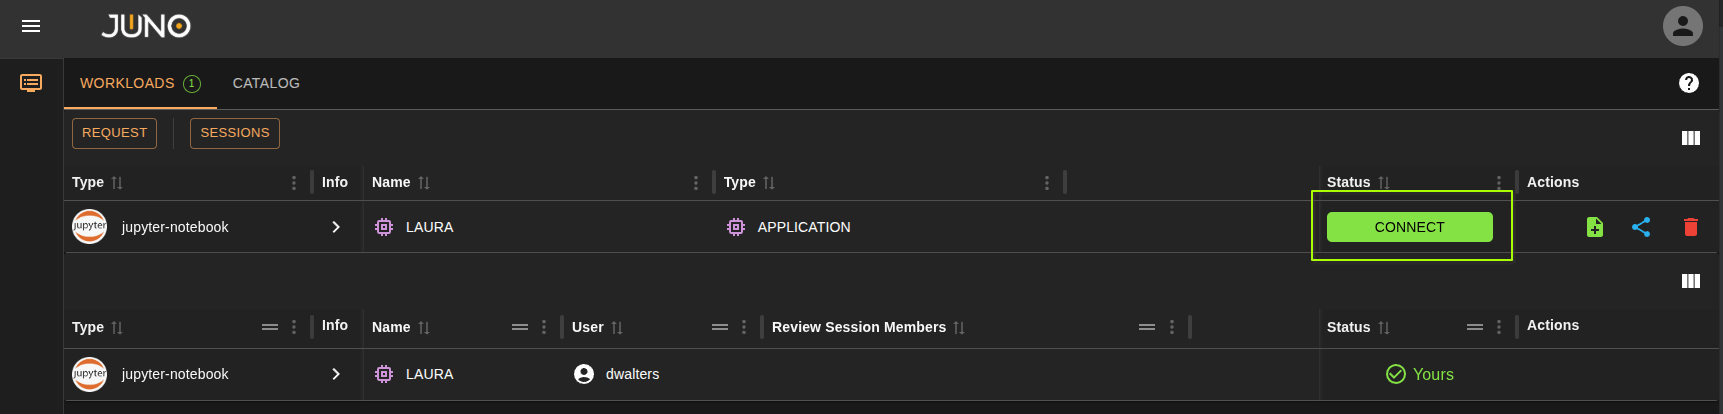
Once the workload is ready to be connected too. A green CONNECT button will appear in the status. Click this button to connect.
LoadBalancer Ingress Endpoints
If a workload is exposed through a LoadBalancer ingress, its ingress endpoints are now included alongside the
workload's other endpoints. When a workload has more than one endpoint available, the CONNECT button becomes a dropdown,
letting you pick which endpoint you want to connect to. You no longer need to look the load balancer address up in the
cluster yourself.
You can also pull connection info for an individual Service resource from the resources table. See the
resource actions documentation for details.
Workload Actions Menu
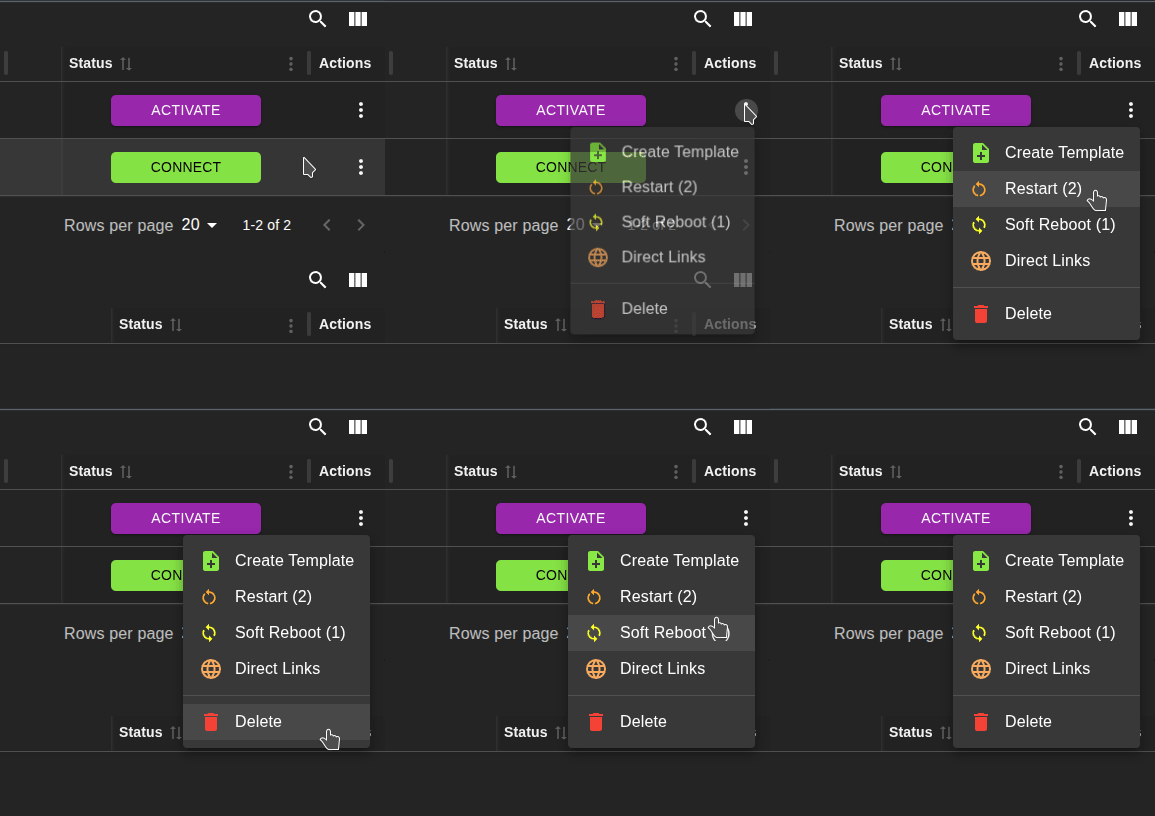
The individual action buttons that used to sit on each workload row have been consolidated into a single actions menu. Click the 3 dots in the workload row's Actions column to see the actions available for that workload, such as:
| Action | What It Does |
|---|---|
| Hibernate | Scales the workload's compute down without deleting it. See Manual Hibernate/Activate. |
| Direct Link | Provides a direct URL link to the workload, useful for sharing or bookmarking. |
| Create Template | Creates a workload template from the running workload. See Create template from workload. |
| Restart | Restarts every resource in the workload that supports it, in one click. |
| Soft Reboot | Sends a reboot signal to every resource in the workload that supports it, in one click. |
| Delete | Deletes the workload. |
Activating is done from the connect button
Activate is not part of the actions menu. A hibernated workload is activated the same way as before, from the workload's connect button.
Restart and Soft Reboot are resource level actions grouped into this menu, giving you a quick and easy way to fire off a shared action across multiple resources rather than navigating the resources table to find each one and trigger it manually. Every other resource action is still triggered per resource from the resources table, see the resource actions documentation for what each action does.
Auto Shutdown & Hibernation
Workload templates can now be configured in Genesis with an idle shutdown timer. Read more about the template fields that control this behavior here.
Note
Workloads launched from templates created before this release are deprecated and do not have the automatic idle shutdown timer, since they lack values for the new template fields. You can still manually hibernate these workloads at any time, see Manual Hibernate/Activate below. Launch the workload from a newly created template if you want the automatic timer.
Idle Timer & Notifications
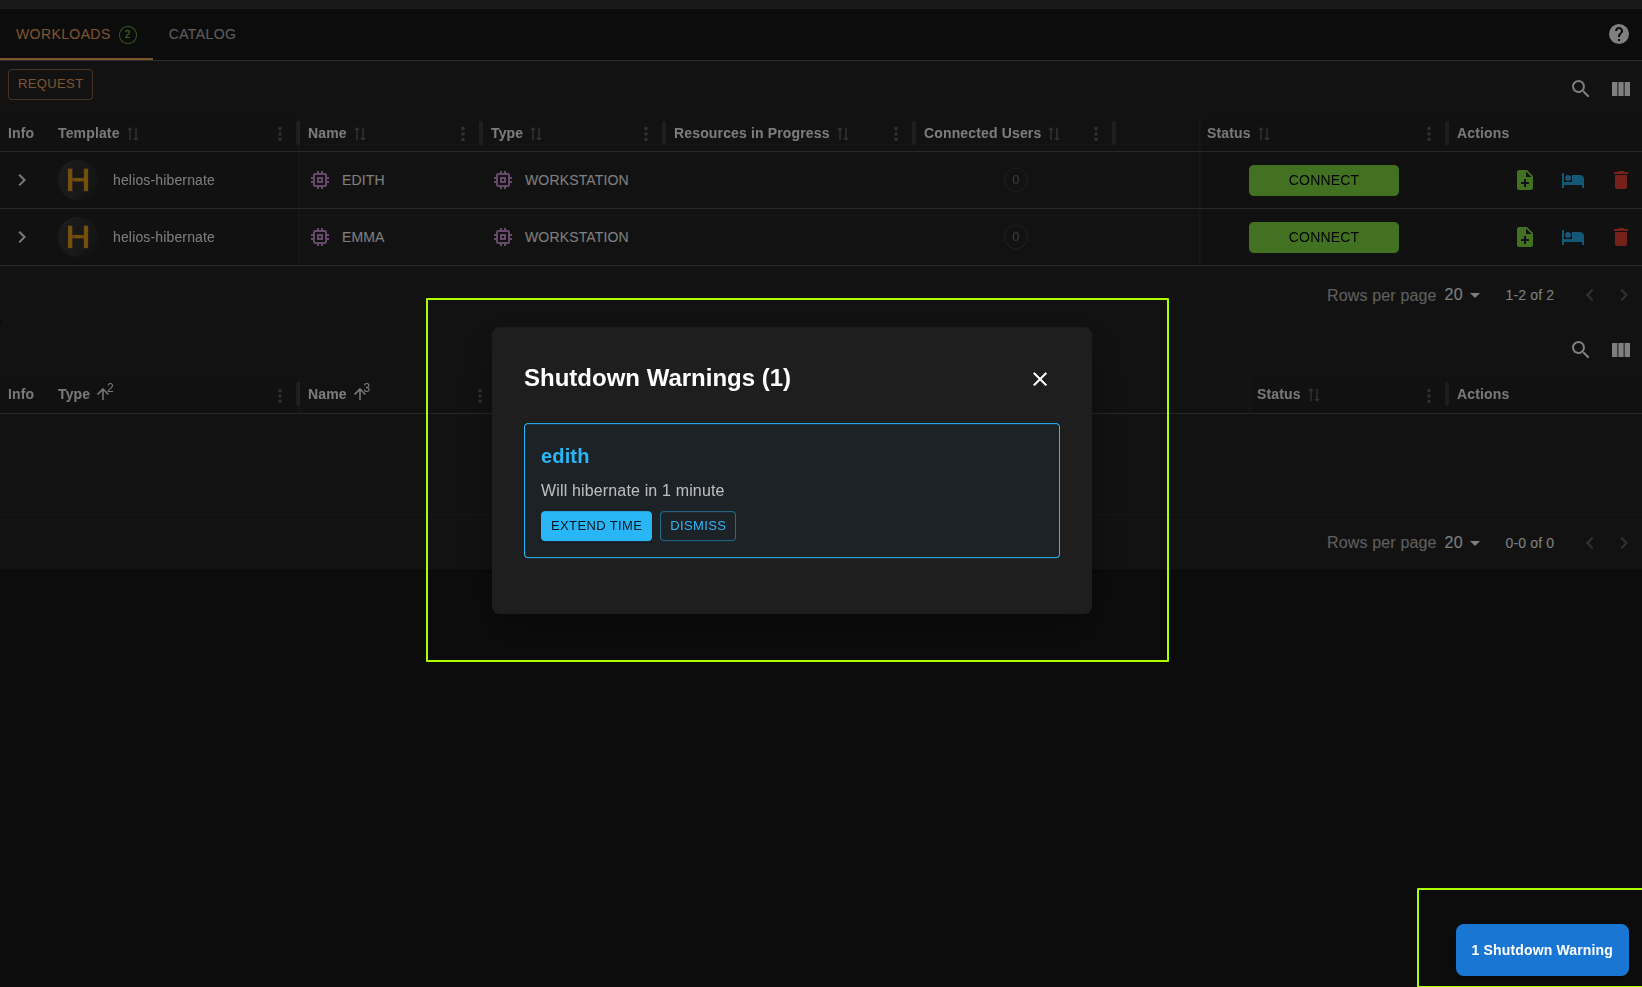
If a workload with auto shutdown enabled has no active connections, its shutdown timer begins counting down. When there are 5 minutes or less remaining before the workload shuts down or hibernates, the workload owner receives a notification in Hubble. From this notification you can:
- Dismiss - Acknowledge the notification and let the workload shut down/hibernate once the final 5 minutes elapse.
- Extend - Reset the timer back to the full
shutdownTimeoutvalue configured on the workload's template.
Manual Hibernate/Activate
You don't need to wait for the idle timer, workloads can be hibernated on demand directly from the Hubble workloads table via the Hibernate action in the workload row's actions menu. Once hibernated, the workload's connect button lets you activate it again, scaling it back up.
You can also hibernate or activate individual resources within a workload from the resources table. See the resource actions documentation for details.
Not every workload can be hibernated
Only StatefulSet and Deployment resources support hibernation. If a workload doesn't contain either of these
resource kinds, the hibernate action will not be available for it.
Create template from workload
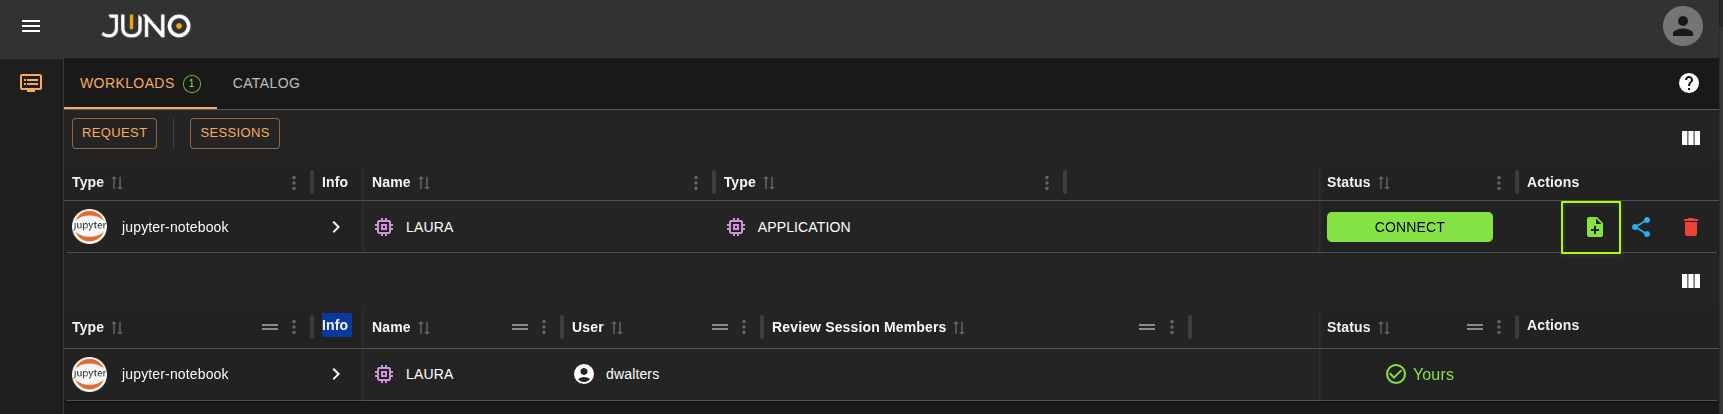
Open the actions menu on the workload row and choose Create Template to create a template from that running workload. This is useful when an admin or kuiper user adds custom environment variables to a workload before launch and wants to save them for later; the created template retains those environment variables.
Review Sessions (Coming Soon)
This functionality is currently being revised. Coming soon...
Admin Control Workloads
Admins have the ability to control another users workload. This works great for debugging, and training purposes.
Note
Access to another user's workload actions, such as hibernate and shutdown, is restricted to admins. Kuiper users can no longer perform actions on other users' workloads.
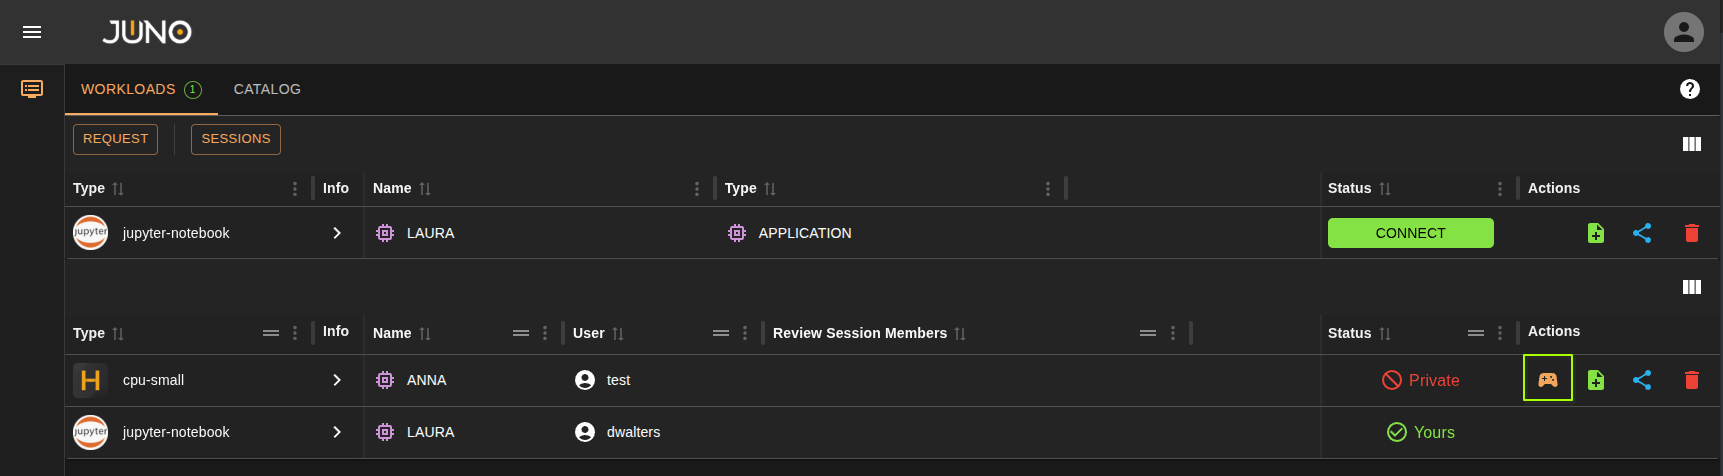
Workload Groups
The workloads table organizes workloads into groups. This replaces the previous Type column, every workload now belongs to one or more groups rather than being labeled with a single type.
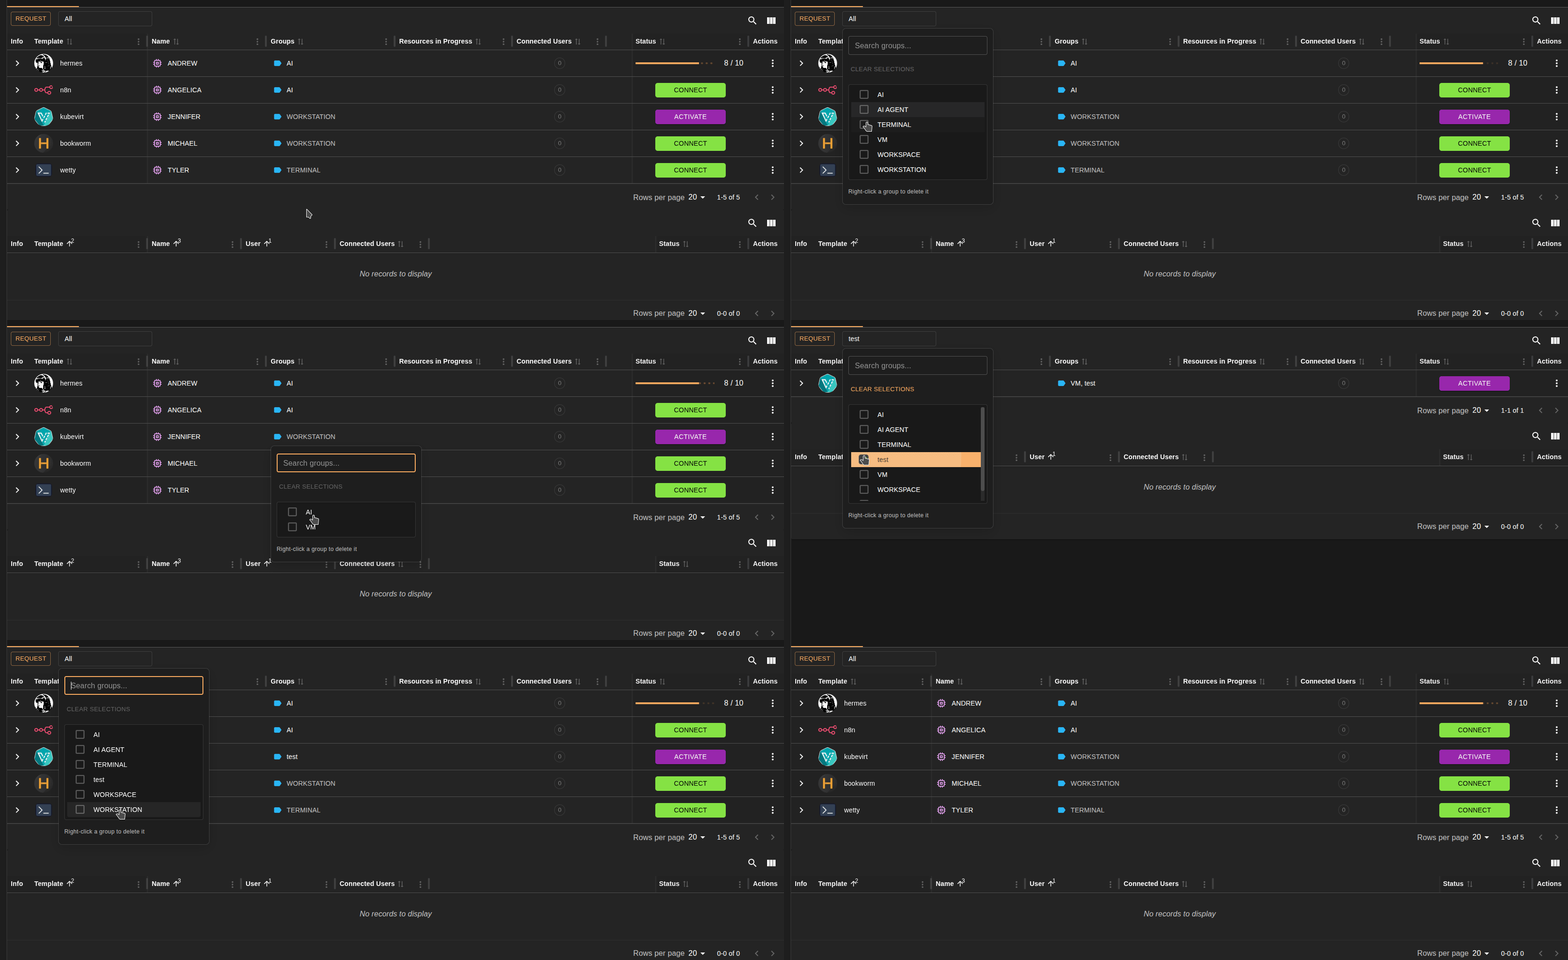
Default Groups
If a workload has not been assigned to a custom group, it is automatically added to a group based on its workload type, as authored in the workloads chart. Workloads are therefore grouped the same way they were labeled under the old Type column, with nothing for you to set up.
Custom Groups
You can create your own groups with custom names and assign workloads to them. A workload can be added to multiple groups at once, so the same workload can appear under more than one grouping, for example both a show name and a department.
Sorting & Filtering
Groups can be sorted and filtered from the workloads table, letting you narrow the table down to just the groups you care about.
Groups persist between sessions
Your custom groups and their workload assignments are saved, they will still be there the next time you log in to Hubble.
Deleting a Custom Group
To delete a custom group, right-click the group in the group selection box and click Delete.