Networking
Note
Network Management is restricted to members of the 'admin' user group. If your cluster is running k3s, you will have the ability to provision new nodes directly through Genesis.
The Network page allows users to label nodes, manage & create per-project network policies, see some of the allocatable resources on a node, and provision new nodes if your cluster is running k3s.

Label Nodes
Your current nodes in your cluster will be displayed on the Active Nodes tab. We provide a quick access feature to label a node for the Juno specific roles by simply clicking the options in the row column. We also provide the ability to see and edit all node labels as well as create new labels via our node labels table. You can access the node labels table either by clicking the tab at the top of the networking page, or within each individual nodes details panel drop down. If accessing via a nodes details panel, the labels will be filtered specifically for the node selected.
Server Roles
| Label | Description |
|---|---|
| Service | The cluster's main control node. At least 1 node must be labeled as a Service node. These nodes run core Orion services and APIs. |
| Workstation | Nodes that will be used to run Kuiper workloads, such as Helios containers. This labels usage is at the descrection of the Terra plugin author. |
| Headless | Nodes that will be used to run intensive batch processing workloads. This labels usage is at the descrection of the Terra plugin author. |
You learn more about our server roles and requirements here
Node Labels Table
From the Node labels table, you can see all labels currently assigned to nodes in your cluster. Edit these labels, and create new labels. Each label is grouped by its key. You can expand each key to show the label values, nodes assigned, and it's available actions.

Create New Label
To create a new label, simply click the "CREATE NEW LABEL" button on the top left of the table. Fill out the form, and click create.

Actions
Each label has two available actions, edit, and delete. Editing allows you to easily update a labels node assignment as well as value. Please note some labels are protected. These are typically required for Orion to run properly and are not allowed to be edited via the UI.

Network Security
Here you can set per-project network policies.
Select Project
Use the project dropdown selector located on the top right of the network policies table.
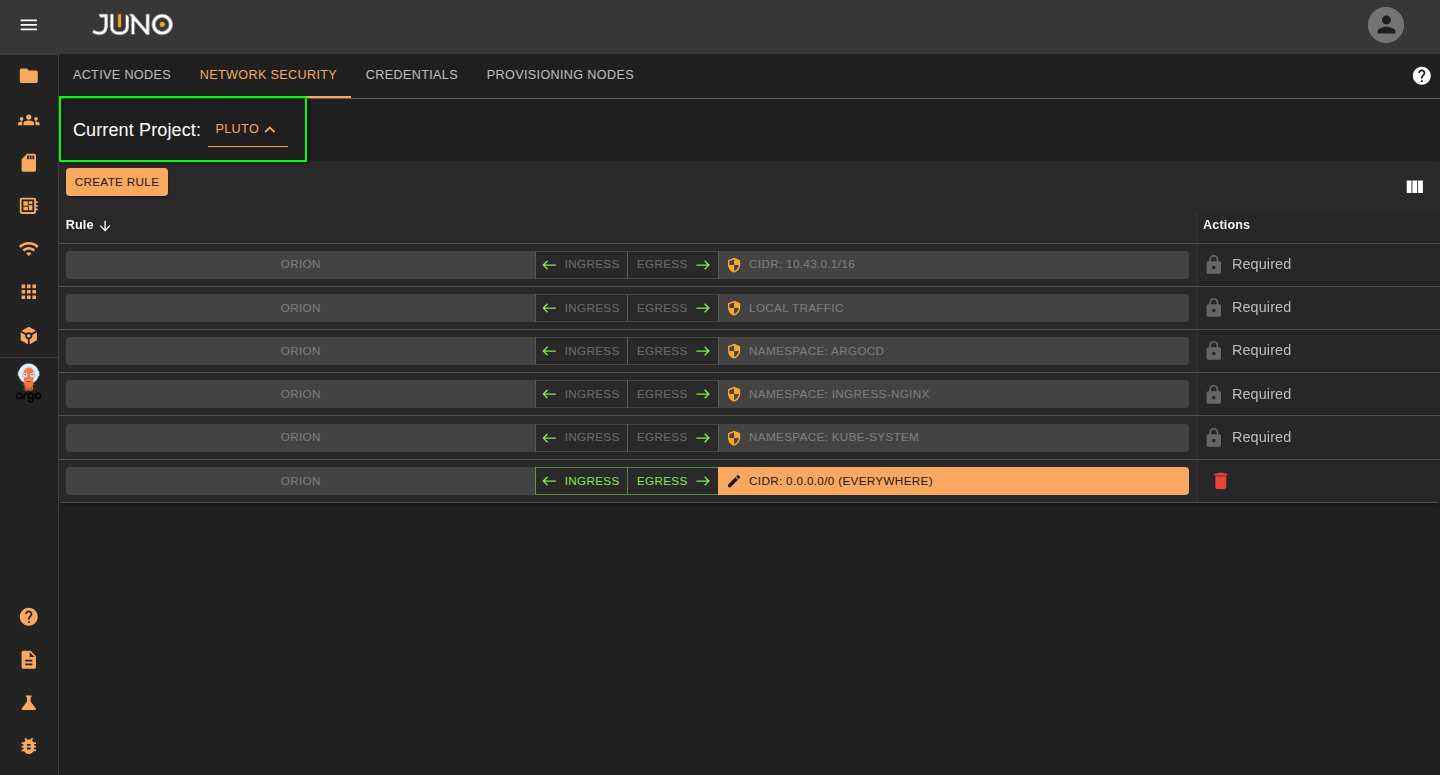
Create/Delete Rule
Click the CREATE RULE button. A new rule will be appended to the table for the project. You can click the delete icon located on the right of the row to delete the rule.
Edit Rule
Ingress/Egress
Select the Ingress or Egress button on the row to control the traffic on your rule. One of the options should be open for traffic. If you want to close both ingress and egress, Just delete the rule.
Ingress Open - All traffic from the targeted namespace/range can reach us
Egress Open - Pods from our namespace are allowed to connect to the target
Edit Rule Properties
Click on the orange bar on the row to edit the rule properties. You can change the rule type and values within the popup.
| Rule Type | Description |
|---|---|
| Namespace | The namespace you want to apply the network policy to. |
| CIDR | Network range you want the network policy to apply to. |
| Grant External Access (Internet) | Lets the project have internet access. |
Provision New Nodes (k3s clusters)
For k3s-based clusters, we offer you the ability to expand your cluster using our playbooks. We assume that the cluster settings match our QuickStart deployment, meaning that:
- Flannel is the CNI and the wireguard backend is enabled
- by default, k3s uses the less secure unencrypted backend. Our platform currently forces controlplane nodes are set up with encryption enabled
If your cluster is running k3s, Genesis allows you to provision a new node within the UI. You can do this by adding new credentials for the node in the credentials tab, then adding the new node using those credentials in the provision node tab.
Adding Credentials
Before provisioning a new node, you will need to add your nodes credentials to the credentials table. You can do this by navigating to the credentials tab and clicking the create credentials button. You can authenticate to a node with a user and use their password or ssh key under the Become Password field.
Warning
If your node does not have passwordless sudo, you will need to supply the user's 'become password'. This is the password Ansible will use to escalate privileges via sudo. This does not apply if you connect as root.
Provision Node
Once you added your node's credentials, navigate to the Provision Nodes tab and click the provision node button. This will open a popup where you can enter the node's information. Make sure to select the credentials for that node and what role you want to be applied to the node. You can later adjust this role in the active nodes tab. Once you submit the form, this will start the ansible job. Expand the row's detail panel to view the logs of the job. Once the node is fully provisioned, the job status will switch to success.